FABULOUS NAIL ART IN MINUTES
Nail art can be surprisingly easy. Follow our how-to guide and get either whimsical dots or candy stripes in just a few steps!

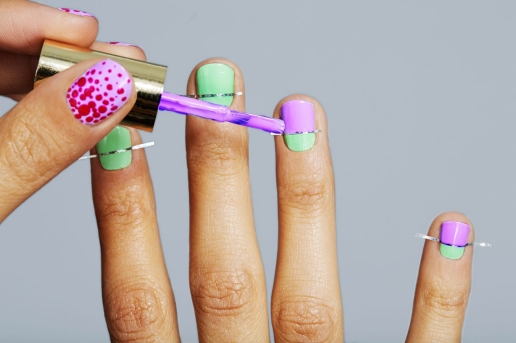
1. First, you want a clean base to start on, so push back the cuticles of each finger. Then apply the first coat of nail varnish. For the candy-striped nails, we chose mint green (left). For the dots, we used light pink (right). If you want to go the extra mile, paint your ring finger in a different color (here, bright pink).

2. To get the whimsical dots, use a toothpick or any other tool with a small point and dip it into the color you’d like to use for the dots (we used the bright pink). Paint dots of different sizes onto each nail, concentrating the dots at the base and then spacing them out nearer the tip of the nail. For the bright pink ring finger nail, use the light pink for the dots. Let it all dry.

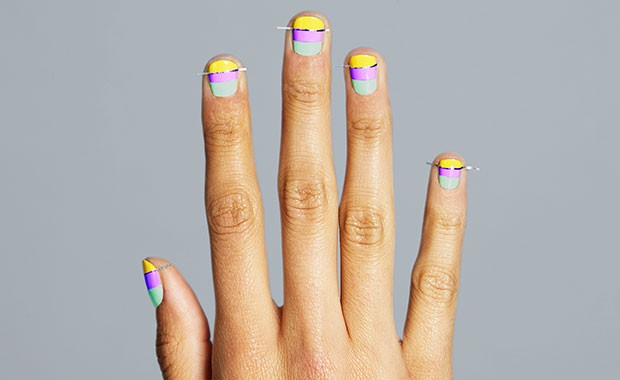
3. For the candy-striped nails, cut thin strips of tape and place a strip about one-third up from the base of each nail. Choose another color of nail varnish (we used lavender) and apply a coat from the tape to the tip.

4. Remove the tape before the varnish has dried and then let everything completely dry.

5. Cut more thin strips of tape and, this time, place the strip about two-thirds up from the base of each nail. Choose a third color of nail varnish (here, it’s yellow) and apply a coat from the tape to the tip. Remove the tape before the varnish has dried and then let everything completely dry.

6. Apply a clear top coat to your nails. Let it completely dry.

7. And you’re done! How easy was that? Which one will you choose today?